Track Changes in Word: Enable, view, customize, remove and hide
Microsoft Word's "Track Changes" feature is a powerful tool that lets you monitor and review edits made to a document. Whether you're collaborating with others, reviewing a report, or editing your own work, it can significantly streamline the editing process. This tutorial will guide you through everything you need to know about using "Track Changes" in Word.
Video: Track Changes in Word
Turn on Track Changes
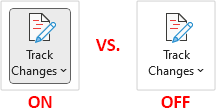
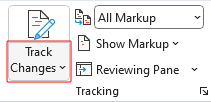
On the "Review" tab, in the "Tracking" group, click the "Track Changes" button to turn it on.

- The "Track Changes" button appears pressed.
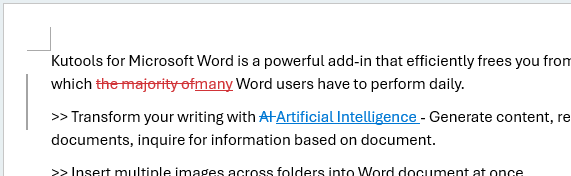
- Deletions are shown with a strikethrough, and additions are marked with an underline, making edits clearly visible. Changes from different authors are shown in different colors.


Notes:
- To use a password to prevent others from turning off Track Changes, go to "Review" > "Track Changes" > "Lock Tracking".
- Your tracked changes may appear different from those shown above depending on your markup settings. To customize the color or style, click the options launcher
 in the lower-right corner of the "Tracking" group, then click "Advanced Options".
Turn off Track Changes
With the Track Changes turned on, go to the "Review" tab, in the "Tracking" group, and click the highlighted "Track Changes" button to turn it off.

- The "Track Changes" button no longer appears pressed.
- Any future edits to the document will not be tracked.
- Previous tracked changes remain in the document until they are accepted or rejected.
Add comments to enhance document review
Adding comments can provide explanations, ask questions, suggest alternatives, highlight issues, and facilitate collaborative feedback during the document review process.
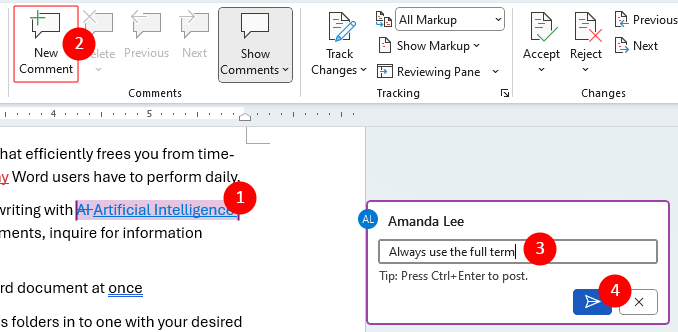
- Select the text where you want to add a comment.
- On the "Review" tab, in the "Comments" group, click "New Comment".
- Enter your comment in the input box.
- Click the "Send" button, or press Ctrl + Enter.

Navigate through tracked changes
By using Word's navigation tools, you can quickly move from one change to the next, ensuring that every modification is carefully reviewed and addressed:
On the "Review" tab, click "Previous" or "Next" in the "Changes" group to move through each tracked change in your document.

See all changes in a list view
Viewing all changes in a list provides a comprehensive overview of the edits made to your document.
- On the "Review" tab, click the drop-down arrow next to the "Reviewing Pane" button.
- Select either "Reviewing Pane Vertical" or "Reviewing Pane Horizontal" to see a detailed list of all changes made to the document.
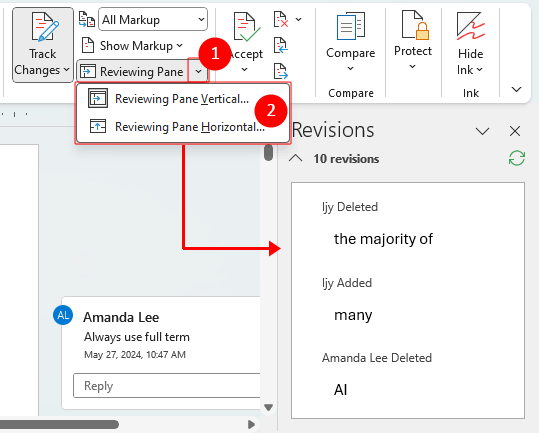

- See all tracked changes in a list format, including insertions, deletions, formatting changes, and comments.
- Click on any change in the "Revisions Pane" to jump to that specific edit in the document.
- Click on an edit in the "Revisions Pane" to make modifications directly in the document, which will automatically reflect in the tracked changes.
- Right-click on a tracked change to accept or reject it.
- Right-click on a comment to reply, delete, or resolve it.
Note: The "Revisions Pane" is designed for viewing and navigating changes, rather than making edits. To edit your document, such as deleting text or comments, make your changes directly within the document itself. These modifications will then be reflected in the "Revisions Pane".
Control how changes are tracked and shown
Whether you’re working on a document with multiple collaborators, editing a draft, or reviewing changes made by others, understanding how to control and customize the way changes are tracked and displayed is crucial.
Choose whose changes to track
When collaborating on a document with multiple authors, you might want to specify whether to track changes from everyone or just your own modifications. Here's how you can do it:
- On the "Review" tab, in the "Tracking" group, click the "Track Changes" dropdown arrow.
- From the dropdown menu, select:
- For Everyone to track changes made by all authors.
- Just Mine to track only your own changes.


Note: To use a password to prevent others from turning off Track Changes, go to "Review" > "Track Changes" > "Lock Tracking".
Adjust how tracked changes are displayed
If you have numerous tracked changes, they can become distracting when trying to read through a document. This section will guide you through the options to adjust the visibility and presentation of tracked changes in your document.
On the "Review" tab, in the "Tracking" group, click the "Display for Review" dropdown, and select your preferred option:
- Simple Markup: Displays the document as if all changes were accepted, with a vertical line in the left margin indicating where a change has been made.
- All Markup: Shows all tracked changes in the document, including insertions, deletions, and formatting changes.
- No Markup: Displays the document as if all changes were accepted.
- Original: Shows the document in its original state, before any changes were made.


Choose the layout for tracked changes (inline or in right margin)
Deciding on the layout of tracked changes can significantly impact how you and others review a document. You can choose to display changes inline within the text or in balloons in the right margin.
On the "Review" tab, in the "Tracking" group, click "Show Markup" > "Balloons", and choose one of the following options:
|  |
|  |
|  |
Note: To see tracked changes in balloons, ensure you are in "Print Layout" view or "Web Layout" view.
Choose what types of changes to show
Filtering the types of changes displayed can help you focus on specific modifications, such as textual edits or formatting changes, making the review process more manageable:
- On the "Review" tab, in the "Tracking" group, click on "Show Markup". You will see checkmarks next to the types of changes that are currently visible.
- Click on any type to clear its checkmark and hide those changes.


Note: Hidden markups will automatically reappear every time you close and reopen the document.
Choose whose changes to display
If your document has been reviewed by multiple people, it might be useful to view changes made by specific individuals to better understand their contributions.
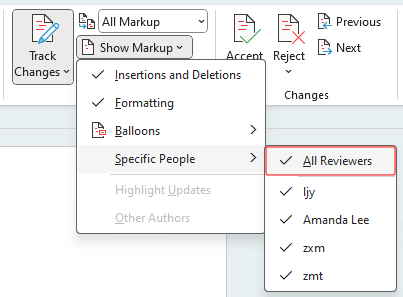
- On the "Review" tab, in the "Tracking" group, click "Show Markup" > "Specific People" > "All Reviewers" to deselect all reviewers.
- Click "Show Markup" > "Specific People" again, and select the reviewer whose changes you want to display only.
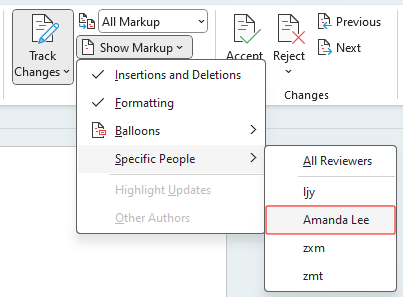


Note: If your document has only two reviewers, simply select the other reviewer to uncheck their name, hiding their edits and allowing you to focus on the specific reviewer.
Remove tracked changes: Accept or Reject
This section will show you how to accept or reject changes individually or in bulk so as to remove the tracked changes in your document.
Accept or reject tracked changes one by one
This method is best when you need to review each change carefully before making a decision. It allows for a thorough examination of each modification to ensure accuracy and appropriateness.
- Select an edit in your document.
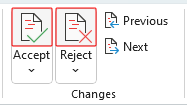
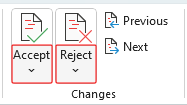
- On the "Review" tab, in the "Changes" group, click one of the following buttons:
- Accept: To keep this change and move on to the next edit.
- Reject: To discard this change and move on to the next edit.

Notes:
- Since Word automatically advances to the next edit after you click "Accept" or "Reject", continue clicking the appropriate button until all changes are addressed.
- If you only need to remove an edit without moving to the next, right-click on the edit and select "Accept" or "Reject" from the context menu.


Accept or reject all tracked changes at once
If you are ready to finalize the document, you can accept or reject all tracked changes in one go. This method is efficient for documents with numerous edits where individual review isn't necessary.
- On the "Review" tab, in the "Changes" group, click one of the following dropdown arrows:
- In the dropdown menu, select "Accept All Changes" or "Reject All Changes". (The picture below shows the dropdown menu that appears when you click the "Accept" dropdown arrow.)


Note: If you need to disable "Track Changes" after removing all tracked changes, select "Accept All Changes and Stop Tracking" or "Reject All Changes and Stop Tracking".
Hide tracked changes and comments when printing
Sometimes you need to print a document without showing the tracked changes and comments. This method ensures your printed document looks clean and professional, free from review marks.
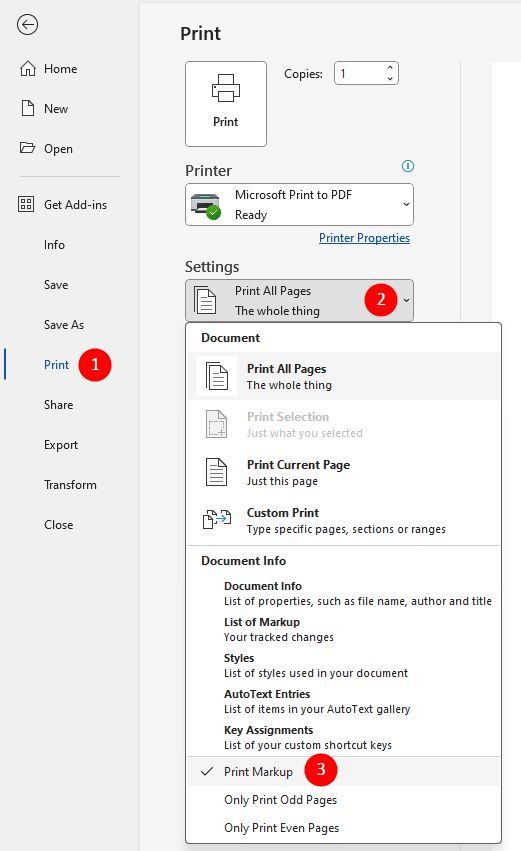
- In your document, go to "File" > "Print".
- Under "Settings", click on the "Print All Pages" drop-down.
- Under "Document Info", select "Print Markup" to uncheck it.

Note: By doing this, you can print a clean version of your document without displaying the tracked changes and comments. And the tracked changes will remain in your document unless you accept or reject them.
Above is all the relevant content related to Track Changes in Microsoft Word. I hope you find the tutorial helpful. If you're looking to explore more Word tips and tricks, please click here to access our extensive collection of tutorials.
Best Office Productivity Tools
Kutools for Word - Elevate Your Word Experience
🤖 Kutools AI Features: AI Assistant / Real-Time Assistant / Super Polish (Preserve Format) / Super Translate (Preserve Format) / AI Redaction / AI Proofread...
📘 Document Mastery: Split Pages / Merge Documents / Export Selection in Various Formats (PDF/TXT/DOC/HTML...) / Batch Convert to PDF...
✏ Contents Editing: Batch Find and Replace across Multiple Files / Resize All Pictures / Transpose Table Rows and Columns / Convert Table to Text...
🧹 Effortless Clean: Sweap away Extra Spaces / Section Breaks / Text Boxes / Hyperlinks / For more removing tools, head to the Remove group...
➕ Creative Inserts: Insert Thousand Separators / Check Boxes / Radio Buttons / QR Code / Barcode / Multiple Pictures / Discover more in the Insert group...
🔍 Precision Selections: Pinpoint Specific Pages / Tables / Shapes / Heading Paragraphs / Enhance navigation with more Select features...
⭐ Star Enhancements: Navigate to Any Location / Auto-Insert Repetitive Text / Toggle Between Document Windows / 11 Conversion Tools...
🌍 Supports 40+ Languages: Use Kutools in your preferred language – supports English, Spanish, German, French, Chinese, and 40+ others!

Best Office Productivity Tools
Kutools for Word - 100+ Tools for Word
- 🤖 Kutools AI Features: AI Assistant / Real-Time Assistant / Super Polish / Super Translate / AI Redaction / AI Proofread
- 📘 Document Mastery: Split Pages / Merge Documents / Batch Convert to PDF
- ✏ Contents Editing: Batch Find and Replace / Resize All Pictures
- 🧹 Effortless Clean: Remove Extra Spaces / Remove Section Breaks
- ➕ Creative Inserts: Insert Thousand Separators / Insert Check Boxes / Create QR Codes
- 🌍 Supports 40+ Languages: Kutools speaks your language – 40+ languages supported!
Table of contents
- Video: Track Changes in Word
- Turn on Track Changes
- Turn off Track Changes
- Add comments to enhance document review
- Navigate through tracked changes
- See all changes in a list view
- Control how changes are tracked and shown
- Choose whose changes to track
- Adjust how changes are displayed (all/simple/no markup)
- Choose the layout for tracked changes (inline or in right margin)
- Choose what types of changes to show
- Choose whose changes to display
- Remove tracked changes: Accept or Reject
- Accept or reject changes one by one
- Accept or reject all changes at once
- Hide tracked changes and comments when printing
- The Best Office Productivity Tools